Description
ODIAG GT100 Functions in Detail
– By connecting the vehicle and diagnostic tool via OBDII, Godiag GT100’s LED will indicate whether the OBDII diagnostic interface has a good communication with the car
– Monitor the voltage of vehicle OBDII interface and display it in real time. If it is less than 11V, please stop the diagnosis and programming to avoid the vehicle being unable to start/data loss/module locked.
Indicator Meaning:
| 1. Manufacturer custom 2. SJE1850 wire 3. Manufacturer custom 4. Power grounding 5. Signal grounding 6. SAEJ2284《CAN》high 7. ISO9141-2&iso, DIS4230-4K wire 8. Manufacturer custom |
9. Manufacturer custom 10. SJE1850 wire《bus-> 11. Manufacturer custom 12. Manufacturer custom 13. Manufacturer custom 14. SAEJ2284《CAN》low 15. ISO9141-2 & ISO/DIS 4230-4L wire 16. Car battery positive |
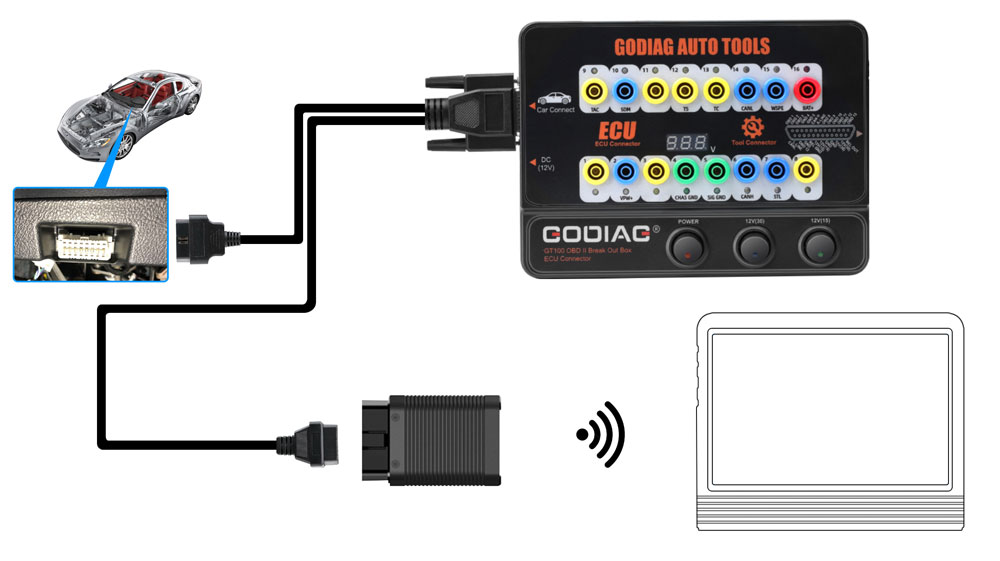
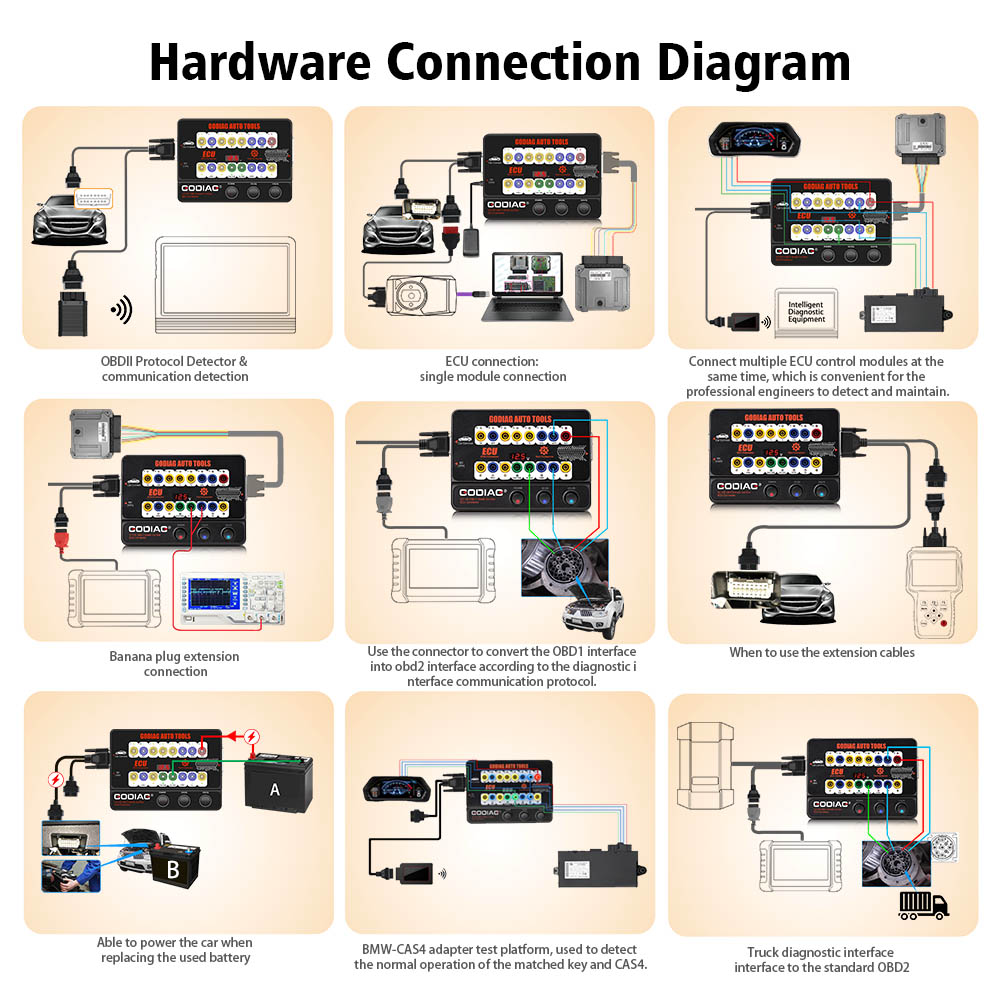
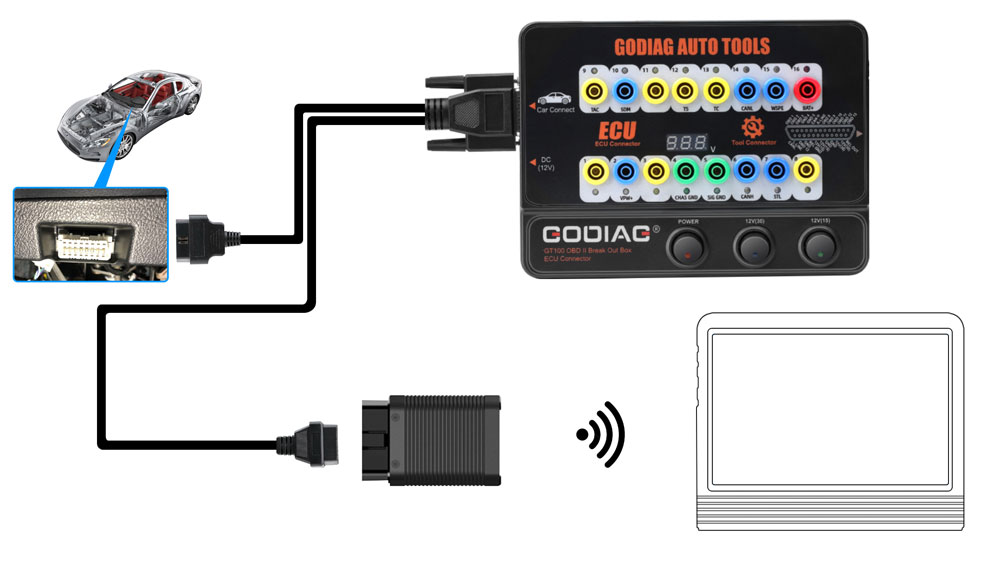
1. OBDII Protocol Detector & communication detection
1) Connect GODIAG GT100 to the OBDII diagnostic port of the car.
2) When the device displays the voltage, turn on the power switch of GODIAG GT100.
3) Then connect to the diagnostic tool, when the tool is communicating with the car, the LED indicator of corresponding protocol will light up or flash. ( If the CAN protocol is detected, it will have the maximum brightness. When the communication is successful, the corresponding CAN-H and CAN-L will dim or twinkling weakly)
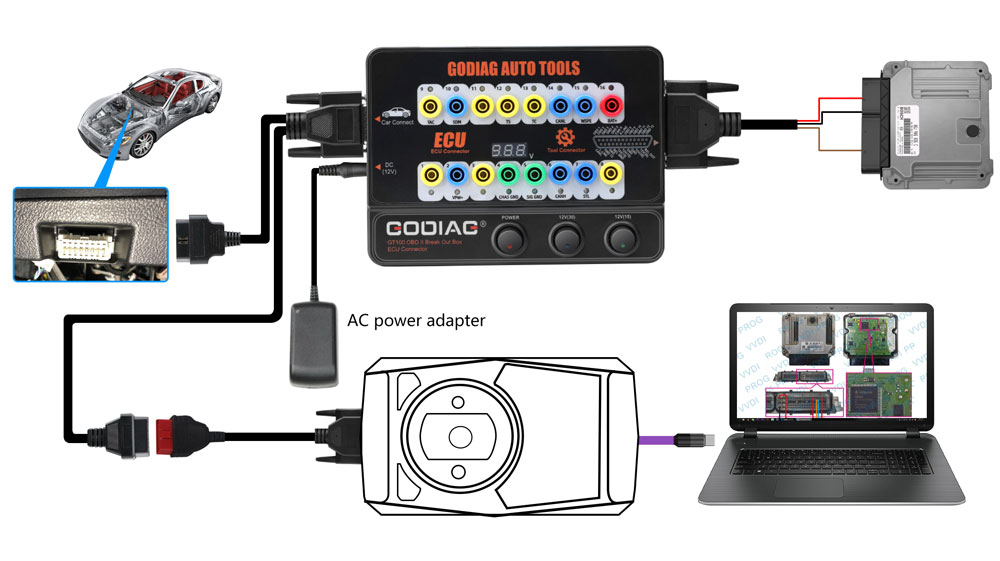
2. ECU connection: single module connection
GODIAG GT100, connected to a single ECU module, is convenient for a user to do the single-module diagnosis and programming.
1) Connect the ECU with the color jumpers. (If the ECU is CAN protocol, please check whether you will need to connect a 120 ohm resistor.)
2) The Godiag GT100 can be powered by connecting to the OBDII diagnostic interface of car, or by an AC power adapter.
3) To diagnose and program for a single ECU by connecting the diagnostic tool or ECU programmer.
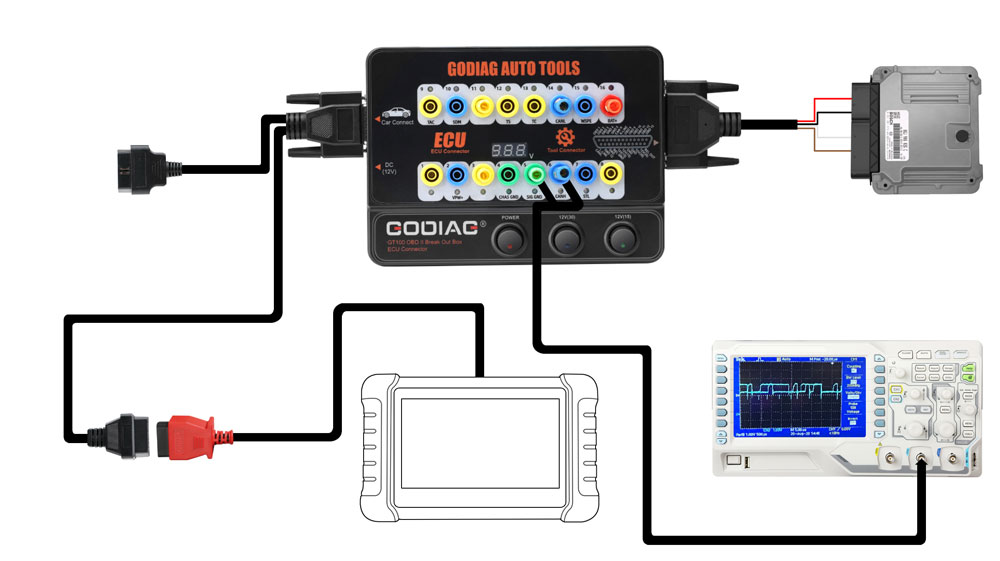
3. Banana plug extension connection:
Extend the car’s OBDII 16pin interface to tell you whether the OBDII interface connection is good or not, which is convenient for the test of OBDII interface voltage waveform.
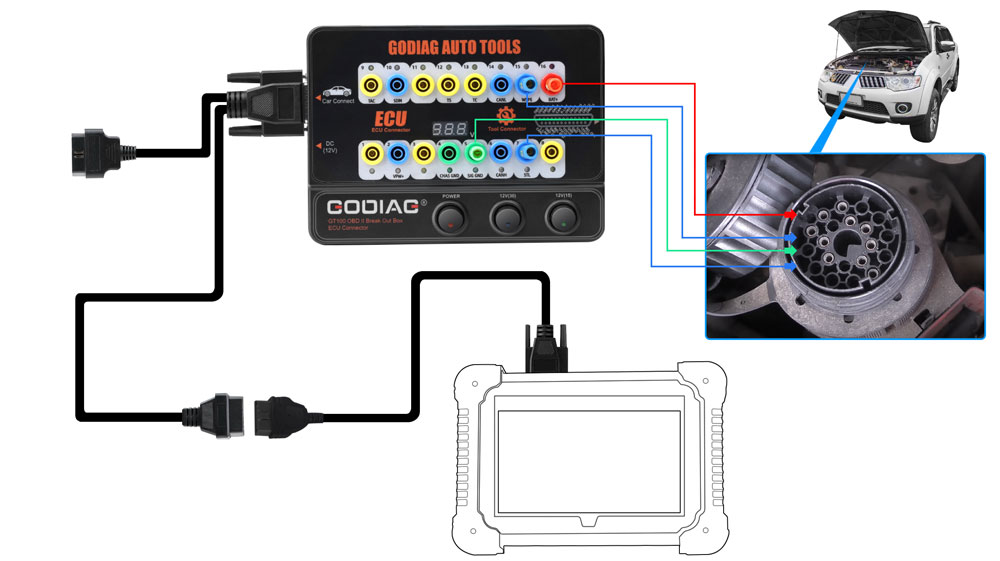
4. Convert OBD1 diagnostic interface to the standard OBD2
Use the connector to convert the OBD1 interface into obd2 interface according to the diagnostic interface communication protocol.
6. Used as the extension cables: The space of the diagnostic interface location is too narrow to connect to the diagnostic tool, or the user find that the diagnostic cable is not long enough during maintenance. It can be extended by 1.2 meters.
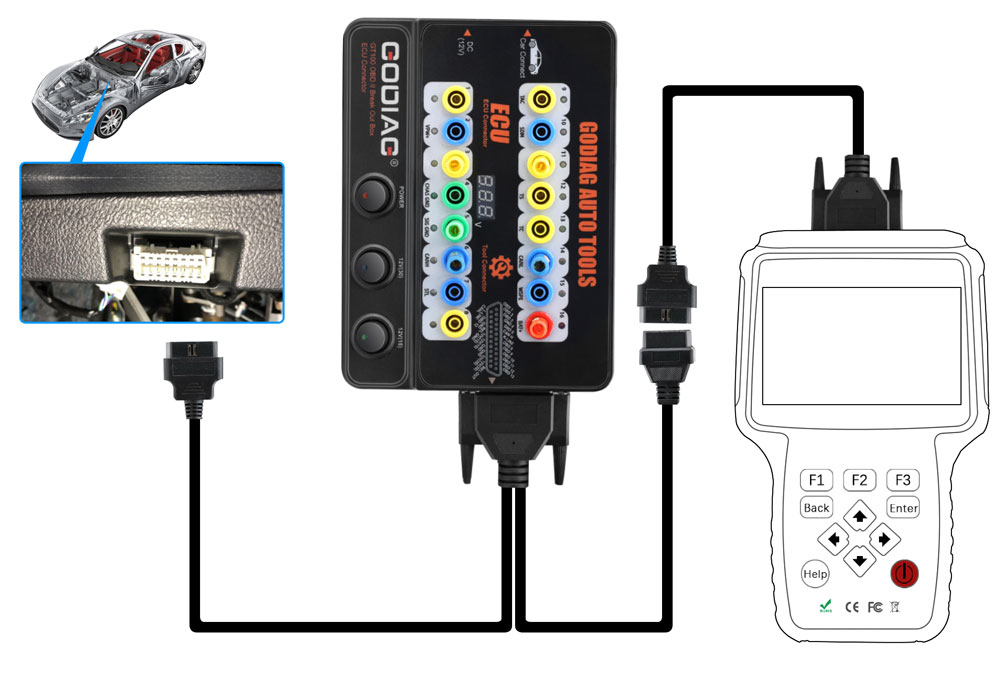
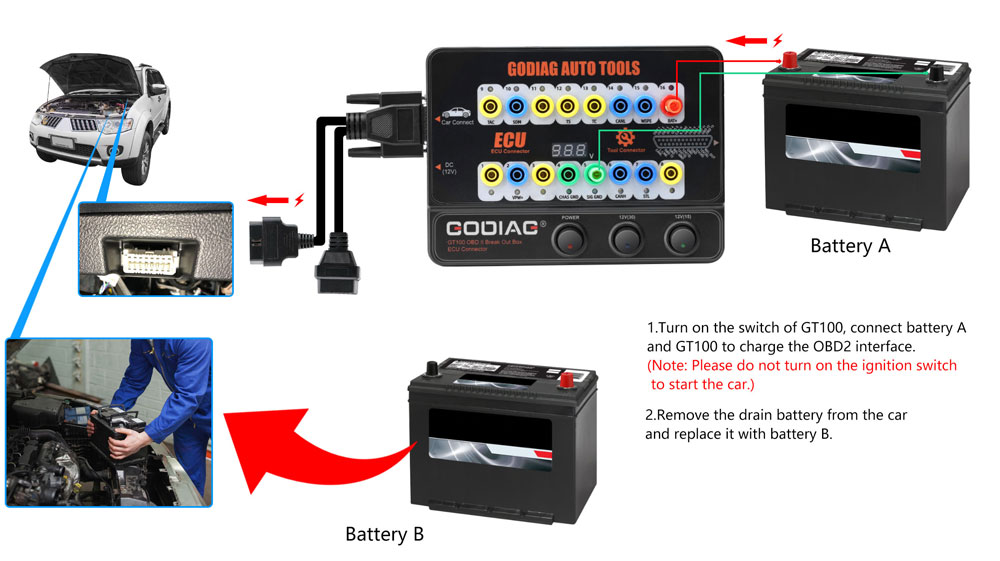
7. Able to power the car when replacing the used battery.
1) Prepare battery A to supply power by connecting to No. 16 / 4 / 5 holes of Godiag GT100 & to the OBD2 diagnostic interface of the car.
[Notice 1. Turn on the power switch of Godiag GT100. 2. Don’t turn on the ignition switch, don’t start the car]
2) Then replace the brand-new battery B with the used battery in the car, which will ensure that the car has fully power to prevent data loss and audio lock-up or the malfunction due to lack of power to the ECU control module.



Reviews
There are no reviews yet.